Master Authentic Filipino Lumpia: Crispy Spring Rolls at Home
There’s a special magic that happens when you bite into a perfectly made Filipino lumpia: the satisfying crunch of a golden-brown wrapper giving way to a savory, well-seasoned filling. This iconic fried spring roll is more than just an appetizer; it’s a staple at Filipino family gatherings, a star at potlucks, and a beloved comfort food that brings smiles to every face. If you’ve ever dreamed of recreating that authentic, irresistible taste in your own kitchen, you’re in the right place. Get ready to transform simple ingredients into a culinary masterpiece that will impress your loved ones and bring the vibrant flavors of the Philippines right to your home. My own journey with lumpia began with a single, unforgettable bite at a neighborhood potluck, courtesy of a generous Filipino neighbor. From that moment, I was determined to master these crispy rolls, and they've since become my signature dish for every celebration. The beauty of Filipino lumpia lies in its deceptive simplicity, offering a hearty balance of meat and vegetables wrapped in a delicate, crispy shell. This guide will empower you to craft your own restaurant-worthy lumpia, ensuring perfectly crispy, absolutely irresistible spring rolls every single time.What Makes Filipino Lumpia So Irresistible?
At its heart, Filipino lumpia is a fried spring roll renowned for its distinctive thin, almost paper-like pastry skin and a robustly flavored savory filling. While similar to spring rolls found in other Asian cuisines, Filipino lumpia often boasts a unique flavor profile and a characteristic crispiness that sets it apart.The Core Components:
- The Wrapper: The secret to that signature crispiness lies in the "lumpia wrapper." These are typically thinner than standard spring roll wrappers, allowing them to fry up incredibly light and shatteringly crisp without becoming greasy.
- The Filling: A delicious medley of ground meat and fresh vegetables forms the heart of lumpia. Traditionally, ground pork is the star, though ground chicken or even beef are popular alternatives for dietary preferences. This is combined with finely shredded or diced vegetables such as:
- Shredded carrots
- Minced green beans
- Finely chopped onions
- Crushed garlic
- Shredded cabbage (a popular addition for texture and flavor)
Crafting the Perfect Lumpia: A Step-by-Step Guide
Making authentic Filipino lumpia at home is a rewarding process, and with a few key techniques, you can achieve that sought-after crispy exterior and flavorful filling.1. Preparing Your Savory Filling:
The journey to perfect lumpia begins with the filling. Heat a tablespoon of cooking oil in a large pan or wok over medium heat. Sauté the minced garlic and chopped onions until fragrant and softened, taking care not to burn the garlic. Add your chosen ground meat (pork or chicken) to the pan, breaking it up with a spoon as it cooks. Brown the meat thoroughly, then drain off any excess fat. This step is crucial for preventing a greasy lumpia.
Next, incorporate your finely shredded vegetables – carrots, green beans, and cabbage. Sauté for just a few minutes until they are slightly tender but still retain a bit of their crunch. Overcooking the vegetables at this stage can lead to a mushy filling. Stir in the soy sauce and a drizzle of sesame oil. Taste and adjust seasoning as needed – a dash of black pepper often completes the flavor profile. Allow the filling to cool completely before wrapping. A warm filling can make the wrappers soggy and difficult to handle.
2. Mastering the Art of Wrapping:
This is where precision pays off. A tightly wrapped lumpia is key to preventing oil from seeping in during frying and ensures a uniform, crispy texture. Work on a clean, dry surface.
- Lay a single lumpia wrapper flat, oriented like a diamond (one corner pointing towards you).
- Place about 1-2 tablespoons of the cooled filling near the bottom corner, shaping it into a small log. Avoid overfilling, as this can lead to wrappers tearing.
- Fold the bottom corner of the wrapper over the filling, tucking it in tightly.
- Fold in the left and right corners towards the center, creating a neat envelope shape.
- Roll the lumpia tightly from the bottom upwards towards the top corner. Apply gentle but firm pressure to ensure there are no air pockets.
- Seal the top corner with a dab of water or a cornstarch slurry to prevent unraveling during frying.
Repeat this process with the remaining wrappers and filling. For a visual guide and more detailed tips on achieving perfect rolls every time, check out our related article: Perfect Lumpia Every Time: Freeze, Fry & Serve for Any Gathering.
3. The Golden Fry:
Deep-frying is the traditional method for achieving that signature crispiness. Heat about 2-3 inches of neutral oil (like vegetable or canola oil) in a deep pot or wok to approximately 350-375°F (175-190°C). If you don't have a thermometer, a good test is to drop a tiny piece of wrapper into the oil; it should sizzle immediately and float to the surface within a few seconds.
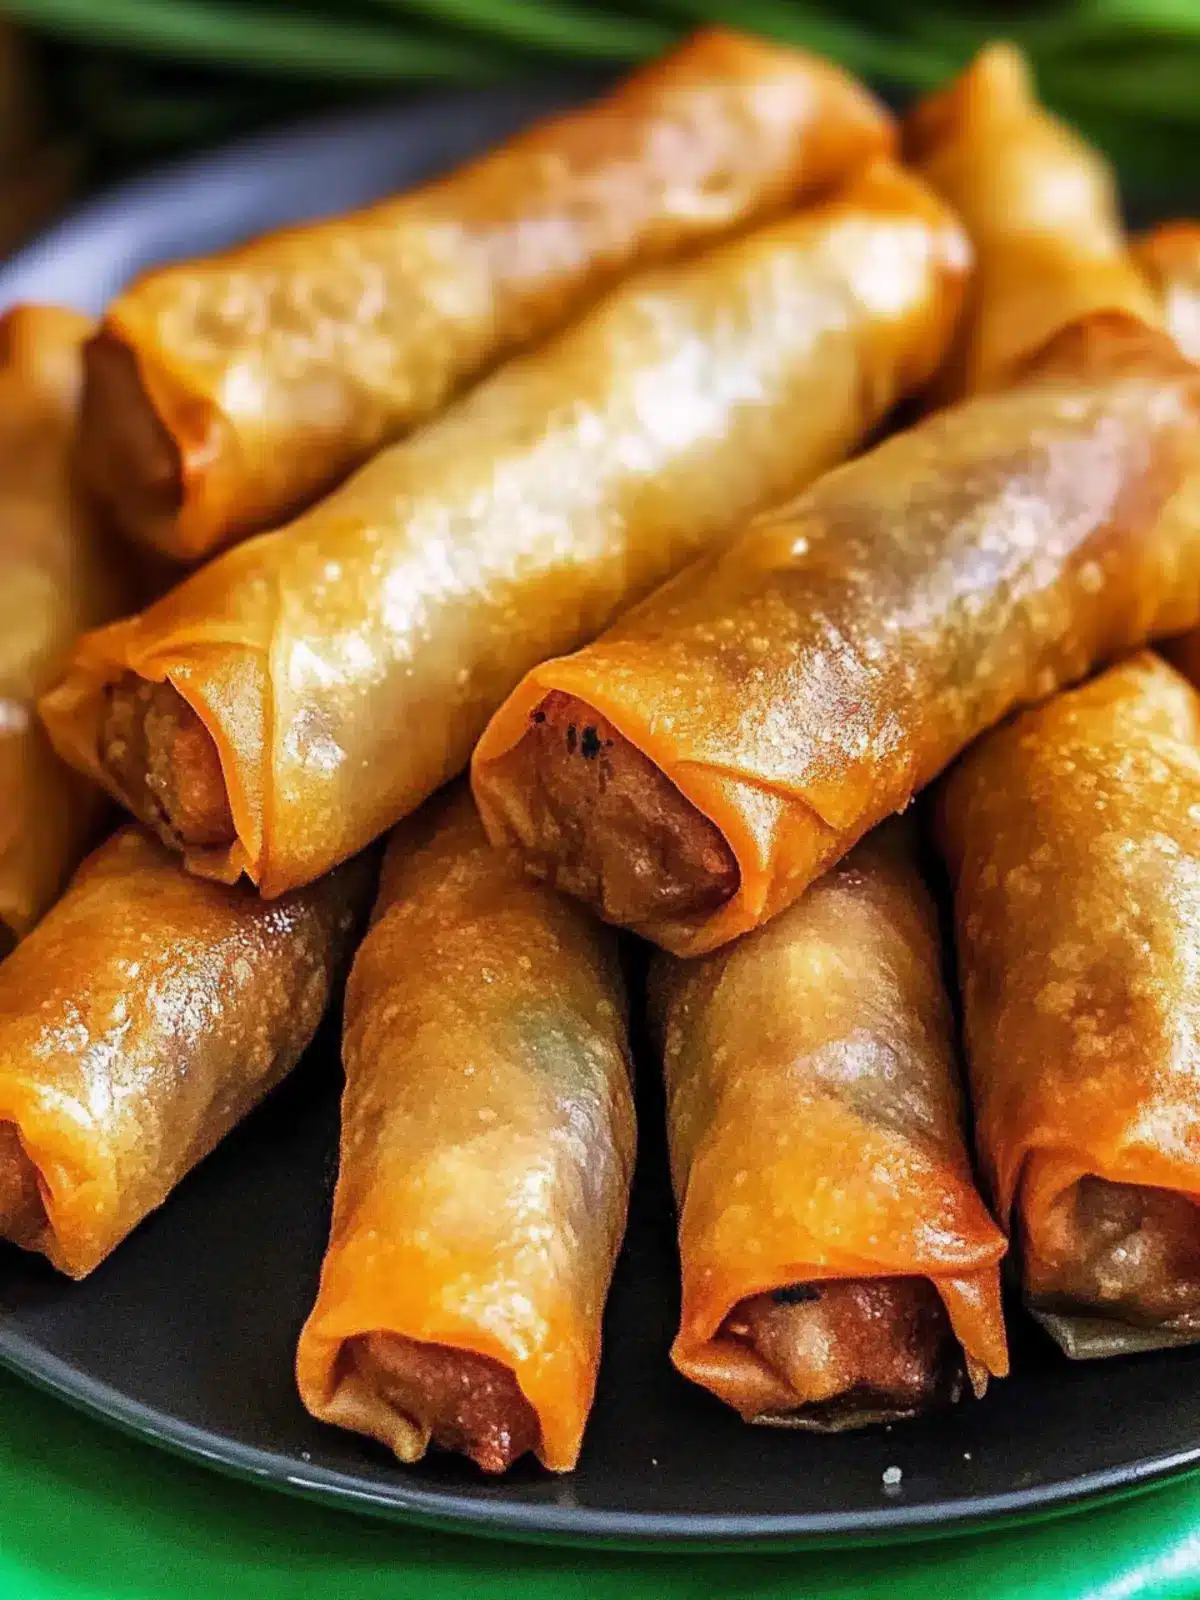
Carefully lower 3-5 lumpia into the hot oil, ensuring not to overcrowd the pan. Overcrowding can lower the oil temperature, resulting in soggy lumpia. Fry for 3-5 minutes, turning occasionally, until they are beautifully golden brown and crispy on all sides. Use tongs to remove the cooked lumpia and place them on a wire rack lined with paper towels to drain excess oil. Serve immediately for the ultimate crispy experience!
Serving Suggestions & Pairing Perfection
Filipino lumpia is rarely eaten alone. Its savory profile makes it an excellent partner for a variety of dipping sauces and complementary dishes. The most classic accompaniment is a vibrant sweet chili dipping sauce, offering a perfect balance of heat and sweetness that cuts through the richness of the fried rolls. For those who prefer a tangier kick, a traditional Filipino vinegar dip (often infused with garlic and chili) is another popular choice. You could also opt for a classic sweet and sour sauce if you're sensitive to heat. Beyond dipping, lumpia can be integrated into a larger meal. Serve it as a delightful appetizer to kick off any feast, or pair it with Discover Traditional Filipino Lumpia: Savory & Crispy Appetizers for an authentic spread. It also makes a hearty side dish to main courses like traditional Filipino Caldereta or as a satisfying component of a simple meal with garlic fried rice. Remember, lumpia is always best served hot, straight from the fryer, ensuring every bite delivers that satisfying crunch.Mastering Lumpia for Any Occasion: Storage & Freezing Tips
One of the greatest advantages of making Filipino lumpia at home is the ability to prepare them in advance, making them perfect for parties, unexpected guests, or simply stocking your freezer for a quick meal.Storing Cooked Lumpia:
If you have leftovers (a rare occurrence!), allow the cooked lumpia to cool completely. Transfer them to an airtight container or wrap them tightly in foil. They can be stored in the refrigerator for up to four days. To reheat, avoid the microwave if you want to retain crispiness. Instead, use an oven or air fryer at 350°F (175°C) for 8-10 minutes, or until heated through and re-crisped.
Freezing Un-Fried Lumpia: The Ultimate Prep Hack!
This is where lumpia truly shines as a make-ahead marvel. Freezing lumpia *before* frying is highly recommended, as it preserves their texture and flavor much better than freezing them cooked. Here’s how:
- Once you've rolled your lumpia, arrange the uncooked rolls in a single layer on a baking sheet lined with parchment paper. Ensure they are not touching each other to prevent them from sticking together.
- Cover the baking sheet loosely with storage wrap or aluminum foil.
- Freeze for a few hours, or ideally, overnight, until the lumpia are completely solid.
- Once frozen solid, transfer the lumpia to a zip-top freezer bag, squeezing out as much excess air as possible. For added protection against freezer burn, you can also wrap the bag in foil.
- Frozen lumpia can be stored for up to three months.
The best part? There’s absolutely no need to thaw! You can fry your lumpia directly from frozen. Simply place them into preheated oil (ensure the oil temperature is slightly lower, around 325-350°F or 160-175°C, to allow them to cook through without burning the outside) and fry for a few extra minutes until golden brown and cooked through. This method guarantees perfectly crispy lumpia whenever the craving strikes, making them an ideal choice for any gathering with minimal fuss.
Mastering authentic Filipino lumpia at home is a culinary journey worth taking. From the careful preparation of the savory filling to the art of tight rolling and the satisfaction of the golden fry, each step brings you closer to a truly delicious experience. These crispy spring rolls are more than just food; they are a taste of Filipino hospitality, a symbol of celebration, and a testament to the joy of sharing good food with loved ones. So gather your ingredients, follow these steps, and prepare to delight everyone with your homemade, irresistible lumpia.
